Last week I missed out on posting, for basically no reason other than my frustration at my own inadequacy. I had baked these delicious healthy cupcakes with the same base as the 80Kcal cupcakes but then I faltered rather badly on the topping. Meringue - been there, done that. I tried a chocolate dip topping but it didn't look good. So then I tried a basic icing topping but again it was too boring and I ended up leaving some of the cupcakes totally bare. Well as irony would have it, the recipient of said cupcakes preferred the frosting free ones, which left me feeling a little bit.....why did I bother, I suck, inadequacy cloud..... you get the picture!
This week however I return and this time I am keeping things simple with delicious, healthy-ish autumnal muffins. They are deliciously spiced with cinnamon and nutmeg and bejeweled with plump sultanas. The muffin itself is made with whole-wheat and oats to make it healthy and wholesome. The over-all effect is not too sweet but hits all the right notes of a little treat when you wanna be good too. It would make a perfect breakfast muffin.
Spiced Whole-wheat Sultana and Oat Muffins
300g Wholewheat flour
30g Oatflakes
20g Wheat germ
2 tsp Baking powder
1 tsp Baking Soda
1/2 tsp Salt
1 tsp Cinnamon
3/4 tsp Nutmeg
150g Caster Sugar
2 Egg yolks
240ml Natural low fat yoghurt
120ml melted Butter
250ml strong Tea
200g Sultanas
to decorate
20g Rolled Oats
25g Brown sugar
If you're planning this recipe in advance it's best to soak the sultanas overnight but if you don't have time just start soaking the sultanas before you take out any of your ingredients to get started.
Preheat your oven to 200'C/400'F/Gas Mark 6. Mix together your flour, oat flakes, wheat germ, baking powder and soda, salt, cinnamon and nutmeg. Normally I would say your should sieve them together but that's difficult with the wholewheat and wheat germ and all that so I say whisk them thoroughly.
In a separate bowl add your sugar, melted butter, yoghurt, egg yolks together and again whisk thoroughly. Now pour the dry ingredients onto the wet ingredients and mix with a wooden spoon only enough to combine. Then drain the tea away from the sultanas and cover the sultanas in a little more flour. Add the sultanas and again mix only until combined. Spoon into muffin tin and heat a frying pan on the hob. Toast the rolled oats. Once the oats are toasted pour them into a container with the brown sugar and pour this combination over the scooped muffins before baking.
Bake for 20-30mins and cool on a wire rack. Then enjoy being healthy and happy =)
Monday, November 19, 2012
Monday, November 5, 2012
Ghoulish Tricks and treats - Raspberry and White Chocolate Alco-cake pops
A little late for all hallow's eve, I will admit but these delicious monsters are just as edible in spherical form any time of the year.
These little ghouls are shaped into skulls and then dipped/covered in white chocolate.
Raspberry and White Chocolate Alco-cakepops (makes 24)
Raspberry Cake
300g Unsalted Butter
300g Caster Sugar
3 whole eggs
4 egg yolks
400g Plain White Flour
1 tsp salt
2 tbsp Beet juice/ 1 tbsp red food colouring
2 cans of preserved/ 300g fresh Raspberries
2 tbsp granulated sugar
Cake-pop mix
60-100ml Raspberry Liquer
300mlWhipped Cream
2-3tbsp Icing Sugar
Decorations
Cake pop sticks
500g White Chocolate
Black/Red/Glitter Colour powders
1 tbsp Alcohol of choice
To make your cake, preheat your oven to 180/350/Gas mark 5. Put your raspberries and 2 tbsps of sugar into a saucepan and heat and beat until you have a liquid. Put this liquid through a sieve and back into the saucepan, reduce for 3-5 minutes until you have a raspberry sauce.Put aside to cool.
Beat together the butter and sugar together until they are light and fluffy. Beat the eggs and egg yolks and then sieve your flour and salt. Alternating between the egg mixture and the flour add each into the butter/sugar and stir to combine. Finally add in your raspberry sauce and red food colouring until you have achieved a dark pink/red mixture. Pour into a cake tin and cook for 30-40 minutes or until a tooth pick comes out clean. Put your cake on a rack to cool.
Once your cake is cool break it up into crumbs. Whip the cream and icing sugar together. Fold in the raspberry liquer. Fold (do not mash) this mixture into the cake crumbs and then roll the mixture gently into balls. To make the ghouls heads i took the head of a skeleton doll and cut it in half. I then sterilized it, greased it with butter and pressed the ball into it. Then set your cake balls in the fridge while you melt the white chocolate.
Melt 3/4 of the white chocolate over a saucepan of boiling water and then remove from the pan and add the rest of the white chocolate to temper. Once the chocolate is nice and melted dip the top of the cake pop sticks and stick them into the balls/heads. Cool these in the freezer briefly and then dip your cake pops/ghouls head into the white chocolate and let them stand in foam/cakepop stand until the chocolate has hardened.
Mix a small amount of black and red colour powders with edible glitter and your tablespoon of high perentage alcohol. Use this to pain on the eyes or to colour the outside of the pops and then enjoy.
As you can see the outside is ghoulish white and the inside is red and still very soft and fluffy (due to the folding, not mashing the cake-pop mixture)
| Eating his head- grr argh yum ;) |
Monday, October 29, 2012
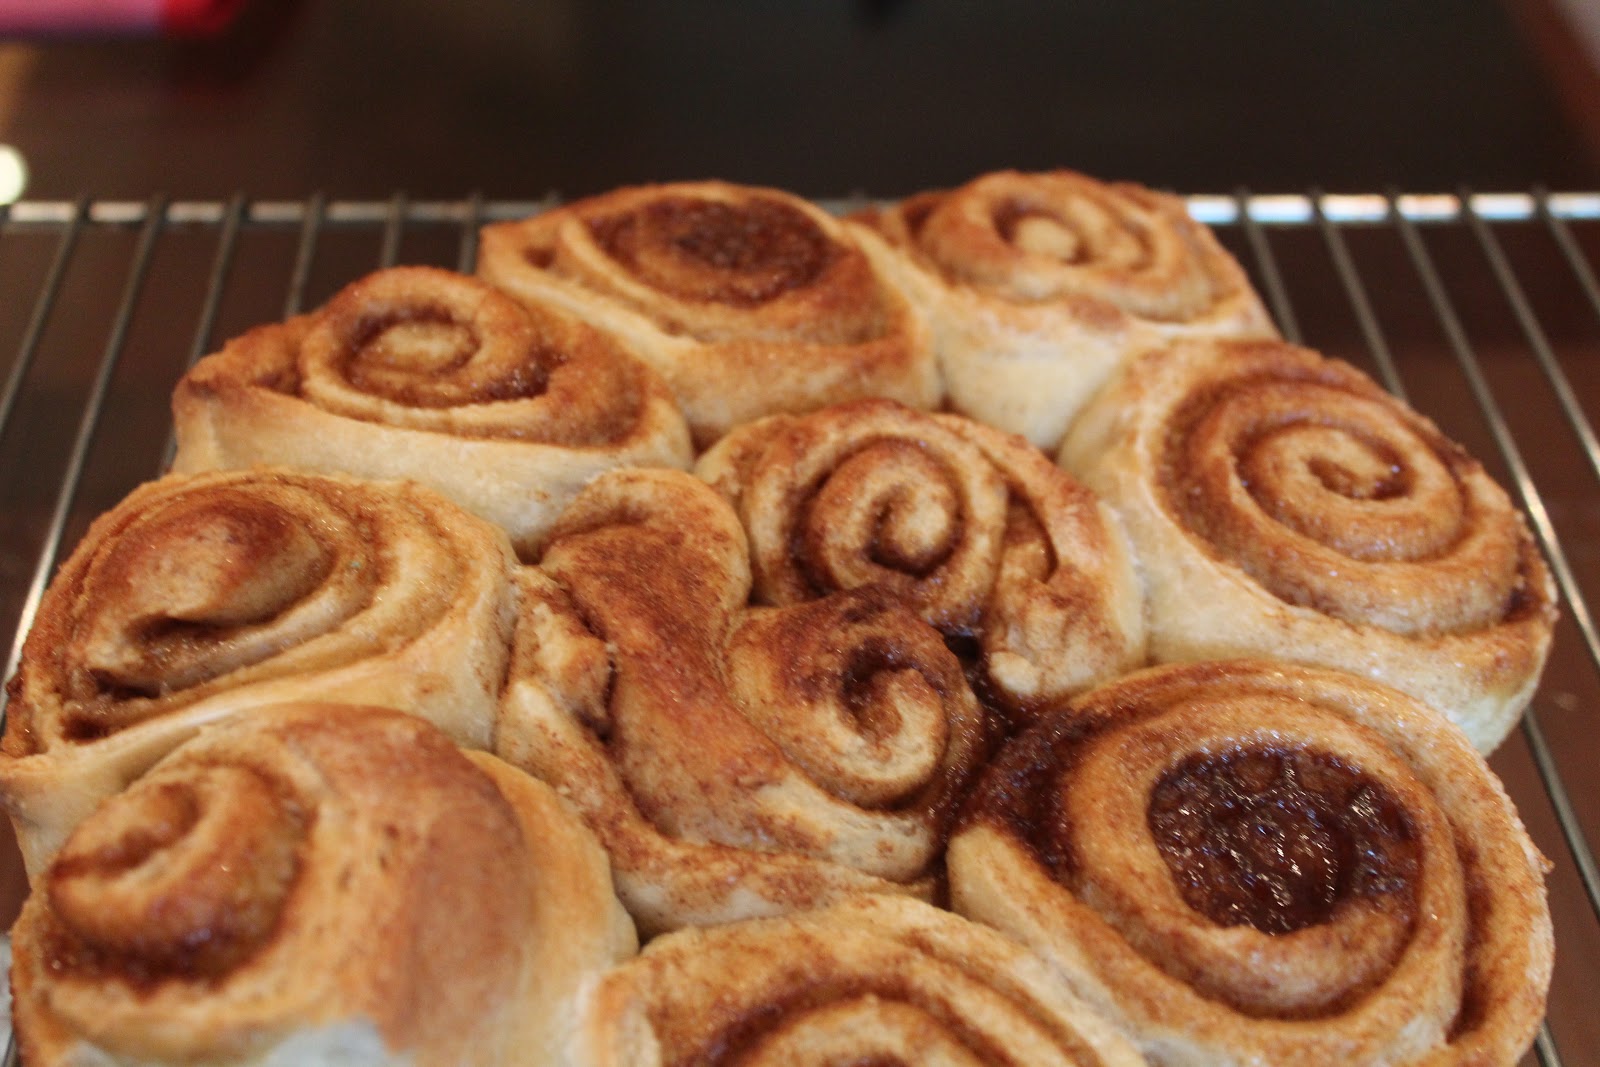
An Easy Cheat to a Tasty Treat - 20 minute cinnamon buns
Last week I was speaking about the importance of taking me time; to bake and relax even when you are very busy. I stand by this position and I believe that it is possible to make time for the important and mentally healthy things in life. That said, sometimes you can only make a little time ;)
Therefore I shall explore something fast but delicious that will simultaneously fill the need to bake and eat delicious home cooked food within a short period of time. I humbly present to you my 20 minute cinnamon buns!
The first thing you will need is dough in a can. I have explored some options based on region. In Ireland and the UK the 'Jus-Rol' company have recently released a selection of products (thin crust pizza, crusty rolls, rustic white roll) that all include a cylinder of dough preserved in a can. In the US/Canada the 'Pillsbury' company do a similar set of products (pizza crusts, breads and also whole wheat options) that involve dough in can.
Side-note: I am not claiming that these are the healthiest thing ever as all these doughs involve some preservative that I will only eat once in a while, but hey we are making cinnamon buns here, health left the building 10 minutes ago and no-one cares because....
Quick and fun Cinnamon Buns
1 Can pre-made dough
50g muscovado brown sugar
25g granulated white sugar
2-3 tbsp ground cinnamon
30ml cream/melted butter
1 - Preheat your oven to 190'C/375'F/Gas Mark 5. Take your can of dough and open on a clean working surface/board
2 - As you can see, from the above photo, the dough inside these cans is rolled. The second step is therefore to CAREFULLY unroll the dough, it will be delicate and it is important to stretch it as little as humanly possible during this stage so easy does it.
3 - Sprinkle and spread around the sugars and then sprinkle on the cinnamon. Pour on the cream or melted butter and spread around. There is no need to spread too much as the rolling will spread this and the resulting sugar fat mixture can clump and leave some areas bare if over worked
4 - Carefully and slowly roll your dough back into the cylindrically shape from whence it came but now with added yum
5 - Cut into 1 inch discs and arrange inside a cake tin or baking tray with raised sides. Place your raw buns close to form a larger bread of connected buns and keep the sides of the buns soft and delicious but leave some room to expand during cooking.
6 - Bake the cinnamon buns for 10-15 minutes at the center of your oven. Remove from the oven and cool on a wire rack (remember hot sugar = not worth it). Then enjoy with or without frosting!
Therefore I shall explore something fast but delicious that will simultaneously fill the need to bake and eat delicious home cooked food within a short period of time. I humbly present to you my 20 minute cinnamon buns!
The first thing you will need is dough in a can. I have explored some options based on region. In Ireland and the UK the 'Jus-Rol' company have recently released a selection of products (thin crust pizza, crusty rolls, rustic white roll) that all include a cylinder of dough preserved in a can. In the US/Canada the 'Pillsbury' company do a similar set of products (pizza crusts, breads and also whole wheat options) that involve dough in can.
Side-note: I am not claiming that these are the healthiest thing ever as all these doughs involve some preservative that I will only eat once in a while, but hey we are making cinnamon buns here, health left the building 10 minutes ago and no-one cares because....
Quick and fun Cinnamon Buns
1 Can pre-made dough
50g muscovado brown sugar
25g granulated white sugar
2-3 tbsp ground cinnamon
30ml cream/melted butter
1 - Preheat your oven to 190'C/375'F/Gas Mark 5. Take your can of dough and open on a clean working surface/board
| Open can of dough |
2 - As you can see, from the above photo, the dough inside these cans is rolled. The second step is therefore to CAREFULLY unroll the dough, it will be delicate and it is important to stretch it as little as humanly possible during this stage so easy does it.
| Mine was mildly stretched but as little as I could manage |
| Yum |
5 - Cut into 1 inch discs and arrange inside a cake tin or baking tray with raised sides. Place your raw buns close to form a larger bread of connected buns and keep the sides of the buns soft and delicious but leave some room to expand during cooking.
| Almost there now, you can almost taste them can't you? |
Monday, October 22, 2012
Spiced apple mini eclairs - a little bite of seasonal joy
I love this time of year. The changing colour of the leaves, the chill in the air, everyone wearing hats and scarves and getting to wear wool tights. It's an exciting season! There are also so many wonderful culinary delights to explore; freshly picked apples, pumpkins, squash and big beautiful sweet potatoes. That said however, it can also be quite a hectic time. The start of school and college, sports clubs and societies getting into full swing, protecting your house/car/health/kids for the winter and of course the many wonderful holidays to prepare for. It can feel like you are running from one thing to the next and it's wholly possible to miss many of the beauties that are on offer as you go.
I think it is important to take a day or at least a few hours to yourself and immerse yourself in all that the season has to offer. It was in this very spirit that I embarked on my latest baking project. Following a brisk and energetic walk in the park where I admired the many colours of the leaves and inhaled the wonderful scent of cold air, I was inspired to capture some of the tastes of the season in a tiny sweet bite and eclairs are something I haven't made for a while. They also require some time and concentration which is perfect when one is determined to experience me time. The outcome was even better than I had expected. The sharp apple contrasts perfectly with the creme patissiere and the salted caramel rounds out the experience. Needless to say it is ill-advised to eat too many but if I'm honest that didn't stop me. Ah well, guess I'll just have to take another walk.
| Just one won't hurt! |
Spiced Apple mini- Eclairs
Choux pastry
300ml water
115g unsalted butter
130g plain flour
pinch of salt
4 eggs
Apple filling
4 cooking apples
2 tbsp lemon juice
1/4 tsp cinnamon
1/2 tsp cloves
Creme Patissiere
3 egg yolks
50g white caster sugar
2 tbsp cornflour
2 tbsp plain flour
300 ml whole milk
1/2 tsp nutmeg
75ml double cream
Caramel
175g White Sugar
175g water
1/2 tsp salt
2 tbsp unsalted butter
Preheat your oven to 200'/400'/Gas mark 6. To make the eclairs put the water and butter into a saucepan and heat until the butter has melted. Bring to the boil. Remove from the heat and mix in the flour and salt. When the mixture has formed a dough, return to the heat and continue to mix for a minute of so to dry out the dough. Remove from the heat and gradually add one egg at a time, mixing thoroughly and quickly to ensure that the egg doesn't have a chance to cook before it is mixed in. Your arms will hurt doing this but persevere - it is worth it. Once all the eggs are in, scoop your mixture into a piping bag and pipe little 2" lines of dough onto a lined baking tray. Bake for 10-15 minutes and do not open the oven until they are done as this will affect the rise.
To make the apple filling, peel and chop your apples and mix the pieces in the lemon juice as you go to preserve the colour. Put your apple slices into a dry saucepan and put the spice on top. Do Not Mix yet. Let the apples start to stew and release juices for a minute, then mix. Continue to mix and heat until the apples have achieved the appearance of apple sauce. Remove the cloves and blitz with a hand-held blender to ensure all the lumps are gone.
- You will notice there is no sugar in the apple filling. There will be enough sugar in the rest of the recipe and the tart taste works well so trust me.
To make the creme patissiere, beat the egg yolks with the sugar until light and fluffy. Bring the milk and nutmeg to a boil in a pan. Mix the corn and plain flours into the eggs and beat thoroughly. Once the milk has boiled, carefully pour about 1/4 of it onto the eggs and beat thoroughly. You can then pour this egg and milk mixture onto the rest of the milk. Continue to whisk and heat for another few minutes until the consistency is thick but smooth. Place in a clean bowl covered in cling-film which you push onto the surface of the creme. Once cooled, whip the cream and fold into the creme patissiere.
Start the caramel as your piping your eclairs, it will help you to avoid the tempting mix. Using two piping bags fill one with apple and one with creme patissiere. For the apple bag top it with a small injection piping nozzle and use a wide nozzle for the creme. Inject the nozzle of the apple bag into the end of the eclair and pipe along the bottom on the eclair, repeat this with the creme and you will feel the eclair fill up and become heavier. Keep an eye on the caramel and swirl if necessary. Repeat this process with all the eclairs and leave to stand.
When the sugar has turned a golden brown add the butter and salt and stir until incorporated. Spoon over the eclairs just before serving. Enjoy
Monday, October 15, 2012
The Low Fat, Low Calorie Cupcake to end all cupcakes
The title of this post is bold. I am very aware of that but I stand behind this cupcake. It is my baby and it took some making but it is for everyone I have every met, known and loved who like my baking but have to say no because they are trying to eat healthy. These said same people usually give out to me for making too many delicious goodies that they cannot resist but subsequently regret when face with a pair of skinny jeans.
To be fair they are complimenting me and I do appreciate it but I feel bad too. As a fellow workout and health food fanatic (50% of the time) I understand how they feel and I want to ease any guilt associated with enjoying my creations and hence..... the 80kcal cupcake.
There is no mad mystery to this cake though. It's a simple alteration to a recipe that Alton Brown actually uses in his cupcake episode of 'Good Eats,'- Chiffon. This is not the cake recipe that most people use,or that I would normally use but it is perfect for health conscious individuals as it contains less flour and butter than most cakes.
The frosting is a meringue frosting and again this is a favourite among healthy types for it's use of egg whites. I injected some of my homemade strawberry jam into the centre for a little extra flavour and moisture in the centre. The overall theme was strawberries and meringue as these were made for an 'End of Summer,' party.
In a seperate clean bowl, whisk together the egg whites and cream of tartar until you have soft peaks. Slowly pour in the 25g of sugar until it has been fully dissolved. Then add this meringue mixture to the rest of the ingredients and fold in. Spoon into cupcake cases and bake for 20-30mins.
Meringue Frosting
Assembling your cupcakes and finishing touches
Once your cupcakes have cooled. Inject a small amount of home-made low sugar jam into each cupcake.
Then pipe a peak of meringue onto each cupcake and toast this using a blow-torch or even a carefully watched grill! Dust your cupcakes in a finally sprinkle of icing sugar and then stand-back and admire your......oh.......you're eating them already?! Fair enough ;)
Nutritional Info - 1cupcake = approx. 80Kcals, 10g carbs, 2.5g protein & 100% awesome
To be fair they are complimenting me and I do appreciate it but I feel bad too. As a fellow workout and health food fanatic (50% of the time) I understand how they feel and I want to ease any guilt associated with enjoying my creations and hence..... the 80kcal cupcake.
| 80kcals!! Frosting and all |
The frosting is a meringue frosting and again this is a favourite among healthy types for it's use of egg whites. I injected some of my homemade strawberry jam into the centre for a little extra flavour and moisture in the centre. The overall theme was strawberries and meringue as these were made for an 'End of Summer,' party.
Strawberry and Meringue guilt-free Cupcakes
- 150g flour
- 1 1/2 tsp baking powder
- 1 tsp salt
- 5 large eggs
- 5/8 teaspoon cream of tartar
- 75g Caster Sugar
- 10g Stevia
- 60ml cup water
- 60ml melted butter
- 1.5 teaspoon vanilla extract
In a seperate clean bowl, whisk together the egg whites and cream of tartar until you have soft peaks. Slowly pour in the 25g of sugar until it has been fully dissolved. Then add this meringue mixture to the rest of the ingredients and fold in. Spoon into cupcake cases and bake for 20-30mins.
Meringue Frosting
- 5 large egg whites
- 5/8 tsp cream of tartar
- 50g caster sugar
- 8g Stevia
- 1 tsp lemon juice
- 1 tsp strawberry flavouring
- 30ml water
Assembling your cupcakes and finishing touches
Once your cupcakes have cooled. Inject a small amount of home-made low sugar jam into each cupcake.
| Almost there, resist the urge to dig in! |
Then pipe a peak of meringue onto each cupcake and toast this using a blow-torch or even a carefully watched grill! Dust your cupcakes in a finally sprinkle of icing sugar and then stand-back and admire your......oh.......you're eating them already?! Fair enough ;)
| Enjoy! |
Thursday, September 20, 2012
Cupcake week - Roasted peaches and cream boutiques
Recently I have been working together with decidedlydelicious to experiment with different recipes and learn from one another. It has really been very enjoyable and educational too. This week was Cupcake Week UK and food network are celebrating it with lots of episodes of cupcake wars and .... a competition for..... a food processor? =/ Well it's ok they are promoting this amazing celebration/competition with the amazing and inspiration YOLO.......erm........? Sorry, sorry rant over, regardless I want to join in this celebration and therefore we offer these tiny celebratory cakes that would be very appropriate as little boutique wedding tokens or just tiny treats for any time.
6 Peaches chopped into cubes
2 table spoons vanilla caster sugar (or just ordinary caster sugar)
30g Butter
1 Cup/125g Sugar
1 cup/125g Flour
1 tsp baking powder
1 tsp baking soda
20ml Cream
1 tsp vanilla extract
1 egg
100ml Milk
Preheat your oven to 200' F/400' C/ Gas Mark 6. Sprinkle your vanilla caster sugar over your peaches and toss them before roasting for 30 minutes or until soft inside and caramelized outside. Reduce the oven to 180'F/350' C/Gas Mark 4
Line your cupcake tins and insert peaches into each case.
Beat together the flour, baking and soda powders, sugar and butter until you have bread-crumb consistency. Slowly pour in the cream and then start beating. As you beat this add another 40ml of the milk until the mixture is creamy and smooth.
Whisk together the rest of the milk with the egg and vanilla and then slowly (watch for splashes at this point) beat this into the dough. Once everything is incorporated scoop the mixture over the peaches and bake for 15-20 minutes on a middle shelf.
Once the cupcakes have cooled ice them with a fluffy vanilla buttercream in tiny rosettes patterns
Roasted Peaches and Creme Boutiques
(inspired by peaches and cream cupcakes from the Hummingbird Cafe)
6 Peaches chopped into cubes
2 table spoons vanilla caster sugar (or just ordinary caster sugar)
30g Butter
1 Cup/125g Sugar
1 cup/125g Flour
1 tsp baking powder
1 tsp baking soda
20ml Cream
1 tsp vanilla extract
1 egg
100ml Milk
Preheat your oven to 200' F/400' C/ Gas Mark 6. Sprinkle your vanilla caster sugar over your peaches and toss them before roasting for 30 minutes or until soft inside and caramelized outside. Reduce the oven to 180'F/350' C/Gas Mark 4
Line your cupcake tins and insert peaches into each case.
Whisk together the rest of the milk with the egg and vanilla and then slowly (watch for splashes at this point) beat this into the dough. Once everything is incorporated scoop the mixture over the peaches and bake for 15-20 minutes on a middle shelf.
Once the cupcakes have cooled ice them with a fluffy vanilla buttercream in tiny rosettes patterns
This recipe as mentioned was inspired and adapted from the Hummingbird Peaches and Cream Cupcake. Their style of cupcake baking is very different and having attempted it I was surprised to see how light and fluffy my cake came out, even with our alterations.
For future attempts I would possibly put the peaches in half way through the cupcake as we found that the fruit sometimes detached from the cake and with these particular cupcakes, where we used the IKEA muffin tin to achieve the slender height of a boutique there was possibly too much cake between the fruit and the icing. That said however, these are delicious and were very well received in this house so please enjoy =)
Sunday, September 9, 2012
Baking for Gout
This year I was introduced to an amazing and wonderful baker, decidedlydelicious who adapts recipes for her lactose intolerance. Through various discussions with her, I discovered how we are all slightly lactose intolerant and the benefits of going lactose free. At the time when we first started talking about this I was trying lactose free while recovering from a cold but since then both myself and the bf have switched to lactose free and find that it has had a very positive effect on our health. We are not 100% lactose free but we try. Dietary restrictions are a pain sometimes and therefore I think that it's important to attempt to provide some solutions for different dietary needs.
This week I will be addressing Gout. There are a number of different dietary suggestions for gout but from what I have read sufferers need to increase protein, whole grains and fibre and reduce sugars and fats. There's no way you can eat cake then right? Wrong! This cake is both delicious, low in fat, high in protein and contains lemon which breaks down uric acid. There will be more than one post on this subject and for reference sake this cake is higher on the fat/sugar than others that will follow so gout suffers can enjoy in moderation!
Lemon and Raisin Cake
100g Plain Flour
200g Kamut Flour
1 tsp baking powder
1/2 tsp salt
125g Butter
15g Stevia
10g Granulated Sugar
1 whole egg and 2 egg yolks
50g apple sauce
2-3 tbsp lemon juice (taste preference)
75g raisins
25g Ground almonds
Preheat your oven to 180C/350F/Gas mark 4. Sieve together your flours, baking powder and salt. In a stand-mixer or with an electric whisk beat together your butter, granulated sugar and stevia until the mixture is very light and fluffy. In separate bowls mix your apple sauce and lemon juice and beat together your eggs.
Slowly, alternating between the flour mixture, eggs and applesauce mixture combine the ingredients, mixing thoroughly. Once a smooth batter has been achieved then add the raisins. Pour into a baking paper lined cake tin and scattered the ground almond onto the top before baking. Bake for 45minutes on a middle shelf or until a toothpick comes out clean. Turn out and let cool fully before eating (this is harder than it seems.
The cake can appear doughy when first cut but you will find that it is soft and delicate and it melts in the mouth. Hopefully you enjoy this whether or not you have gout =)
This week I will be addressing Gout. There are a number of different dietary suggestions for gout but from what I have read sufferers need to increase protein, whole grains and fibre and reduce sugars and fats. There's no way you can eat cake then right? Wrong! This cake is both delicious, low in fat, high in protein and contains lemon which breaks down uric acid. There will be more than one post on this subject and for reference sake this cake is higher on the fat/sugar than others that will follow so gout suffers can enjoy in moderation!
Lemon and Raisin Cake
100g Plain Flour
200g Kamut Flour
1 tsp baking powder
1/2 tsp salt
125g Butter
15g Stevia
10g Granulated Sugar
1 whole egg and 2 egg yolks
50g apple sauce
2-3 tbsp lemon juice (taste preference)
75g raisins
25g Ground almonds
Preheat your oven to 180C/350F/Gas mark 4. Sieve together your flours, baking powder and salt. In a stand-mixer or with an electric whisk beat together your butter, granulated sugar and stevia until the mixture is very light and fluffy. In separate bowls mix your apple sauce and lemon juice and beat together your eggs.
Slowly, alternating between the flour mixture, eggs and applesauce mixture combine the ingredients, mixing thoroughly. Once a smooth batter has been achieved then add the raisins. Pour into a baking paper lined cake tin and scattered the ground almond onto the top before baking. Bake for 45minutes on a middle shelf or until a toothpick comes out clean. Turn out and let cool fully before eating (this is harder than it seems.
The cake can appear doughy when first cut but you will find that it is soft and delicate and it melts in the mouth. Hopefully you enjoy this whether or not you have gout =)
I did!
Subscribe to:
Posts (Atom)
Protein Cheesecake for every weeknight dessert
I've been making this recipe for a while, think 3-4 years in various iterations and adapted it a number of times. This is my favourite,...
-
Some weekends you just need a treat, and other weekends (after two weeks of studying and stress) you need a special treat! A special tre...
-
MTV shows have never really had a massive appeal for me, well not since Daria. So I was hesitant to watch RJ Berger but some friends were la...
-
I've been making this recipe for a while, think 3-4 years in various iterations and adapted it a number of times. This is my favourite,...